

Create a dataset
This page builds Product Catalogue, a dataset of products with their category, type, price and taxes, limited to products that can be sold. You need the Dataset Builder (SAAS) access right.
1. Pick a model
Section titled “1. Pick a model”Every model dataset starts from one Odoo model. Pick the one whose records you want one row for: Sales Order Line for one row per order line, Sales Order for one row per order, Product for one row per product.
-
Go to Odoo Dashboards → Configurations → Dataset Builder and click New Dataset.
-
In Search models…, type part of the model’s name, such as Product, or its technical name, such as
product.template. Click the model in the list.
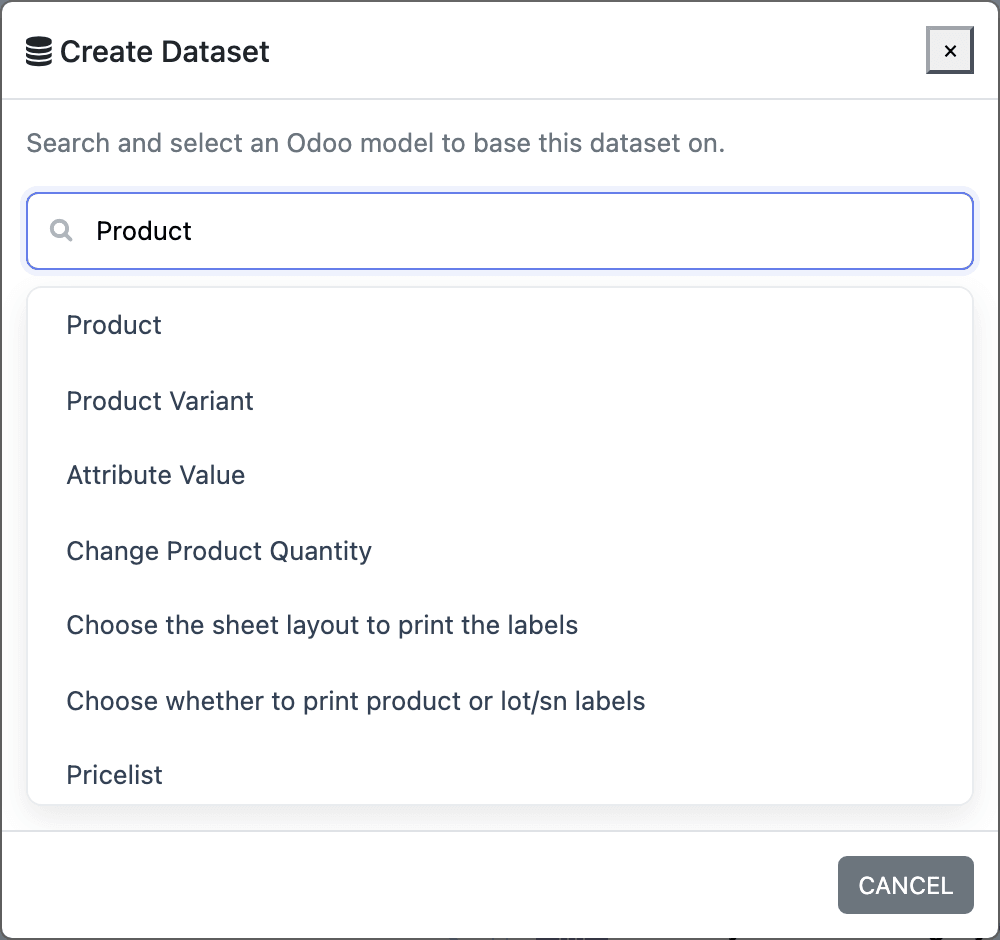
The list includes every model in the database, technical ones too. Product is the product template (product.template); Product Variant is product.product.
-
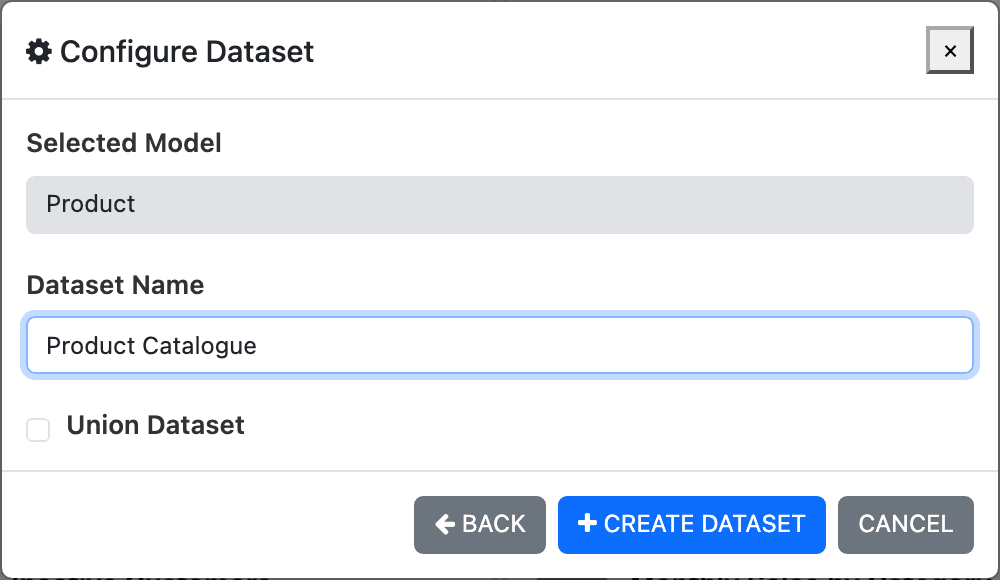
Type a Dataset Name. Keep it unique, also once punctuation is ignored (see Naming datasets).
-
Leave Union Dataset unticked and click Create Dataset.
The new dataset opens with one column already in it: the record’s id. Keep it. Drilldown and row actions use it to find the Odoo records behind a number.
2. The dataset screen
Section titled “2. The dataset screen”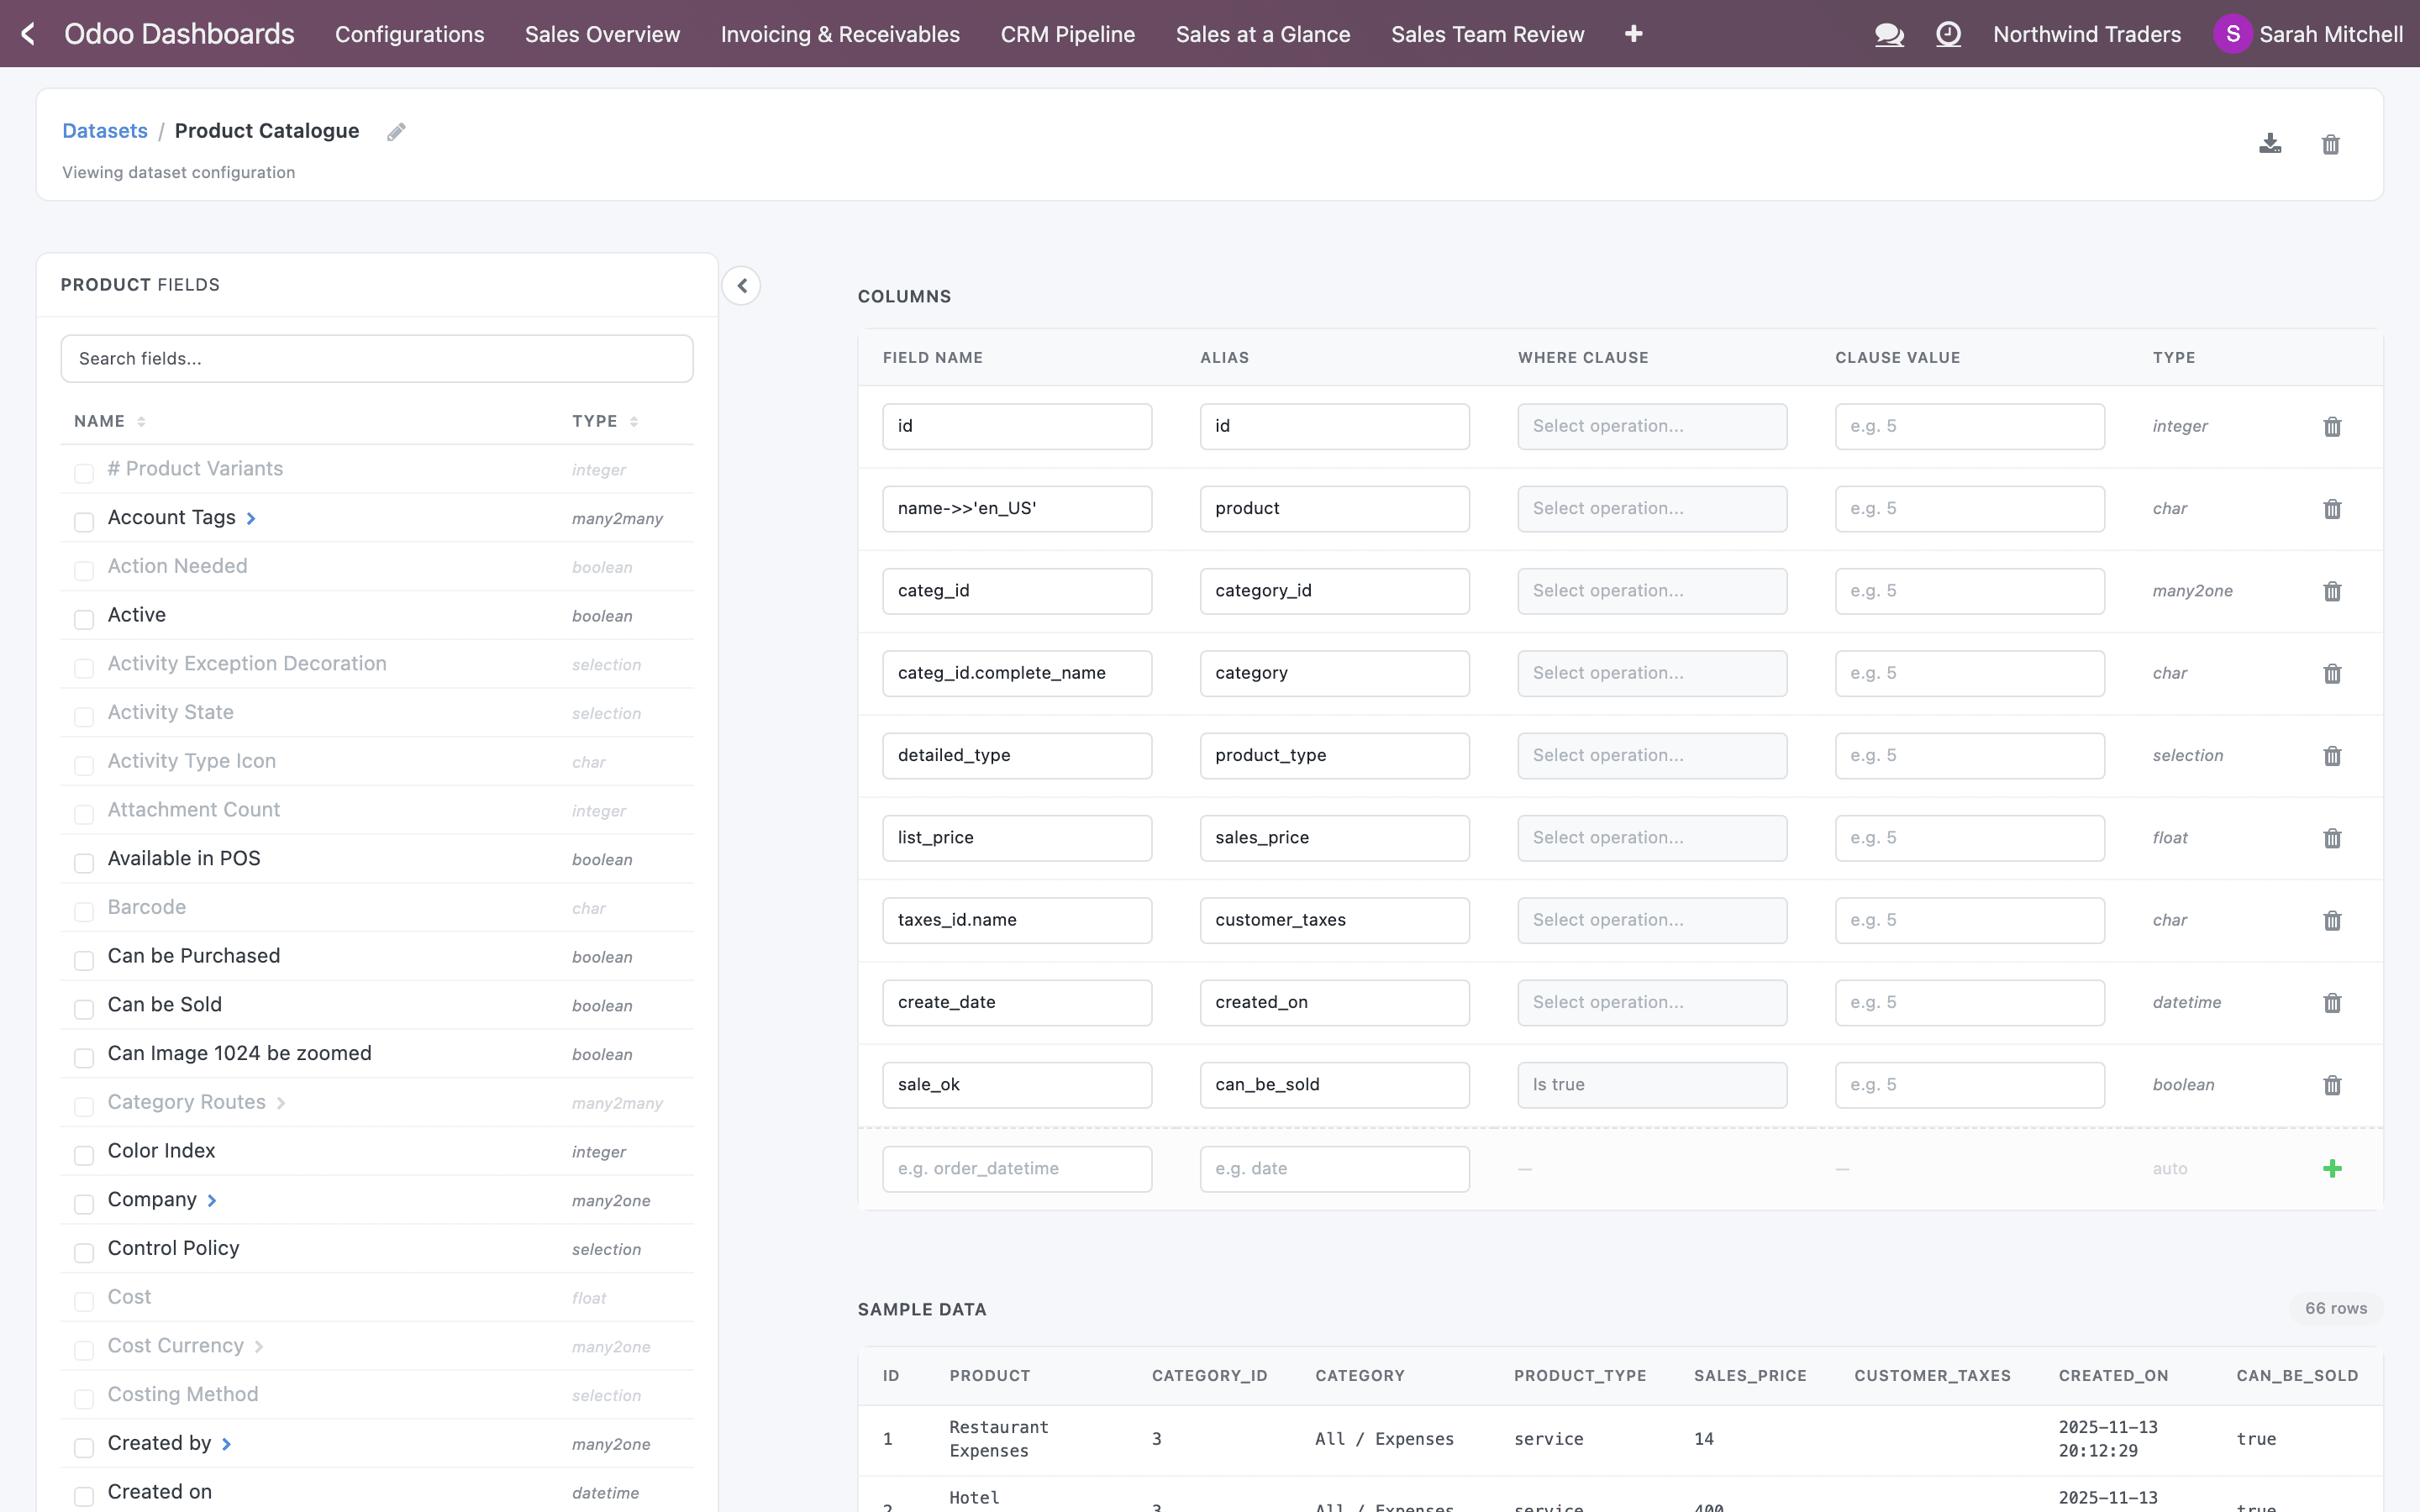
- Rename
- Export CSV and Delete Dataset
- Fields of the model
- Columns: what the dataset provides
- Where Clause: permanent filters
- Sample Data
- The left panel, Product Fields, lists the model’s fields. Search them by name, label or type, and sort by Name or Type.
- The Columns table lists what the dataset provides. Widgets see the Alias of each column.
- Sample Data, under the columns, shows the first ten rows and the total row count. It updates after every change.
Greyed-out fields can’t be picked: they are computed by Odoo and not stored in the database, so SQL can’t read them. One2many and binary fields are not listed at all.
3. Add fields
Section titled “3. Add fields”-
Tick the fields you want in the left panel. Use the search box to find them.
-
Click Insert at the bottom of the panel. It shows how many fields are ticked, for example Insert (3).
-
The new rows appear in Columns with an orange unsaved badge. Change an alias now if you like.
-
Click Save All Changes.
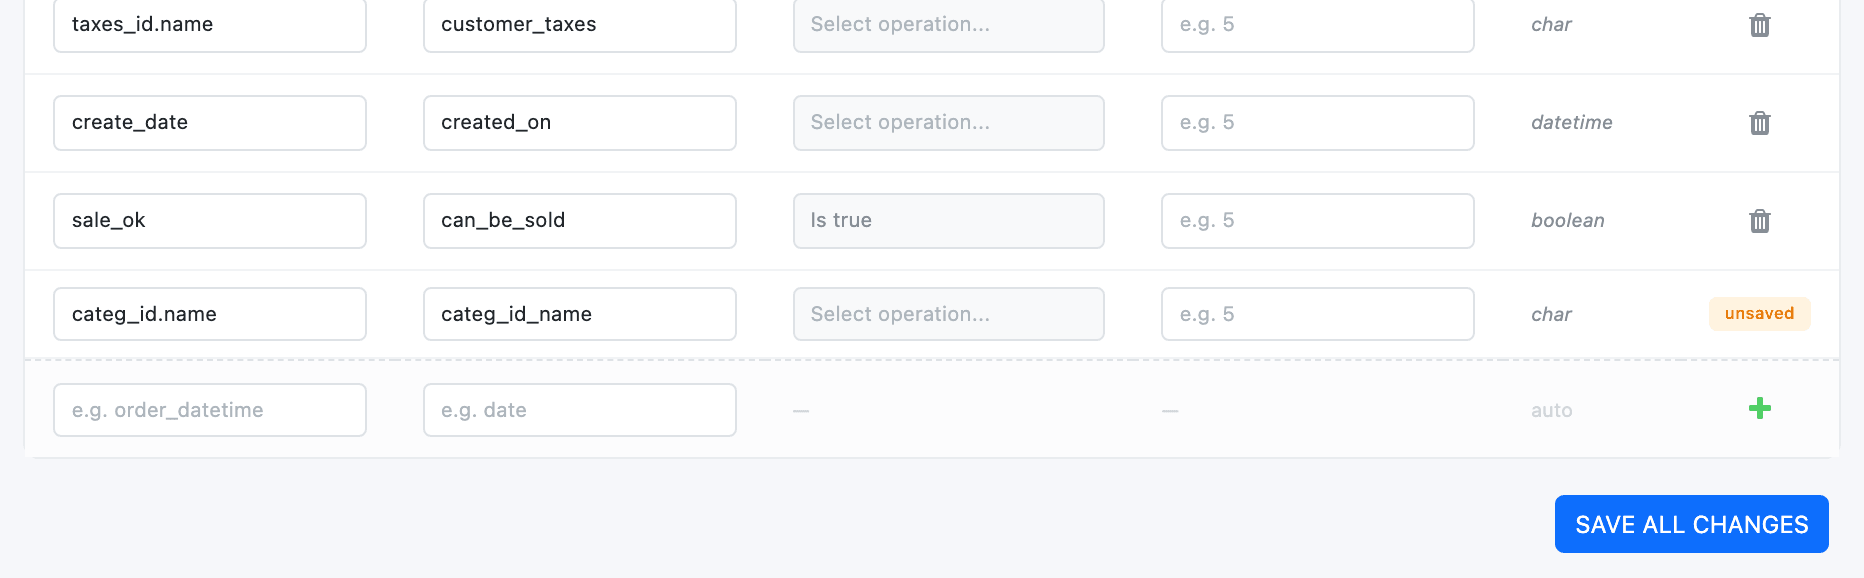
Each saved column rebuilds the dataset view straight away, and a success message counts the saved fields. Leaving the screen before Save All Changes discards the unsaved rows.
You can also type a column by hand in the last row of the table: a Field Name such as partner_id.country_id.name, an Alias, then the + button (Add field). This row saves immediately.
Fields of related records
Section titled “Fields of related records”Fields that point to another record, such as Product Category or Salesperson, have a › arrow (Navigate into field). Click it to see that record’s fields. The breadcrumb at the top shows where you are; Back goes up one level. You can go several levels deep.
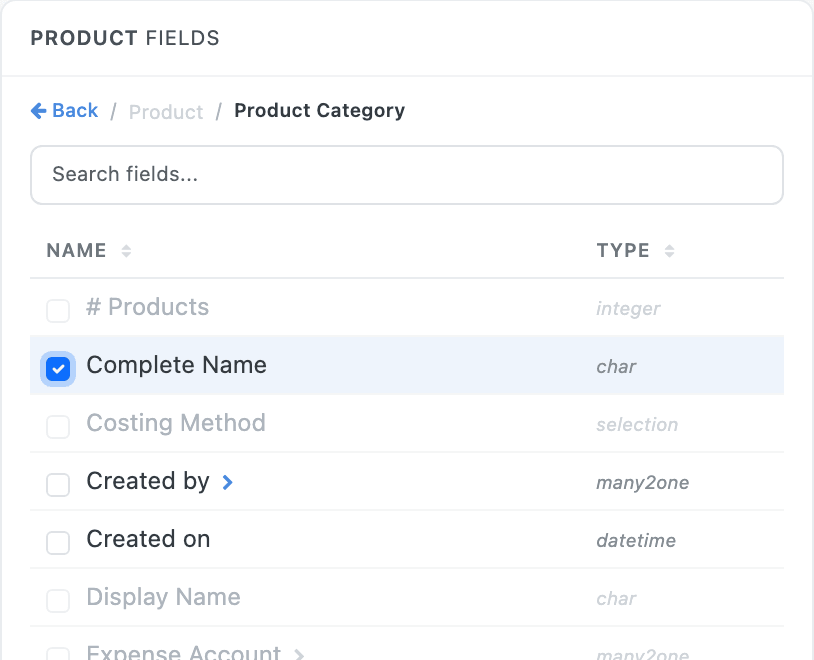
A field picked this way is saved as a dotted path. Complete Name inside Product Category becomes categ_id.complete_name, and its default alias is categ_id_complete_name.
Aliases
Section titled “Aliases”The alias is the column’s name in the dataset, and what you pick in widgets, filters and joins. The default turns the dots of the path into underscores. Short, plain aliases make the builder easier to use: category reads better than categ_id_complete_name.
- Use lower case letters, digits and underscores.
- Each alias must be unique in the dataset. Adding one that exists gives A field with alias “…” already exists.
- Renaming an alias later breaks widgets that use the old name, so settle names early.
4. How values appear
Section titled “4. How values appear”Some field types don’t show what you might expect.
| Field type | What the column holds | Tip |
|---|---|---|
| Many2one (e.g. Product Category) | The linked record’s ID, a number. | To show names, navigate into the field and pick its name, e.g. categ_id.name. Keep the ID column too if you want to join on it. |
| Many2many (e.g. Customer Taxes) | A list of all linked values, e.g. {"Tax 15%"}. A record with none shows an empty cell. |
Fine for display. Grouping or filtering on a list is awkward; prefer a model where each value is its own row. |
| Translatable text (e.g. product Name) | The English text, whatever the viewer’s language. The path gets ->>'en_US' added automatically. |
Leave the suffix in place. |
| Datetime (e.g. Created on) | The time converted from UTC to UTC+3 (Asia/Riyadh), whatever your company’s or users’ time zone. | Use Date fields where you can; they are not shifted. |
| Selection (e.g. Product Type) | The technical value, such as product or service, not its label. |
Rename values in widgets with a Condition custom field if needed. |
The Type column shows the Odoo type of the last field in the path.
5. Add a permanent filter (Where Clause)
Section titled “5. Add a permanent filter (Where Clause)”A Where Clause keeps only the rows that match, for every widget built on the dataset. Product Catalogue keeps only products that can be sold.
-
In the row of the column to filter, click its Where Clause cell (Select operation…).
-
Pick an operation, such as Is true. The list only offers operations that fit the column’s type.
-
If the operation needs a value, type it in Clause Value. For Is in list and Is not in list, separate values with commas:
sale,done. -
Click the check icon at the end of the row (Save), or Save All Changes.
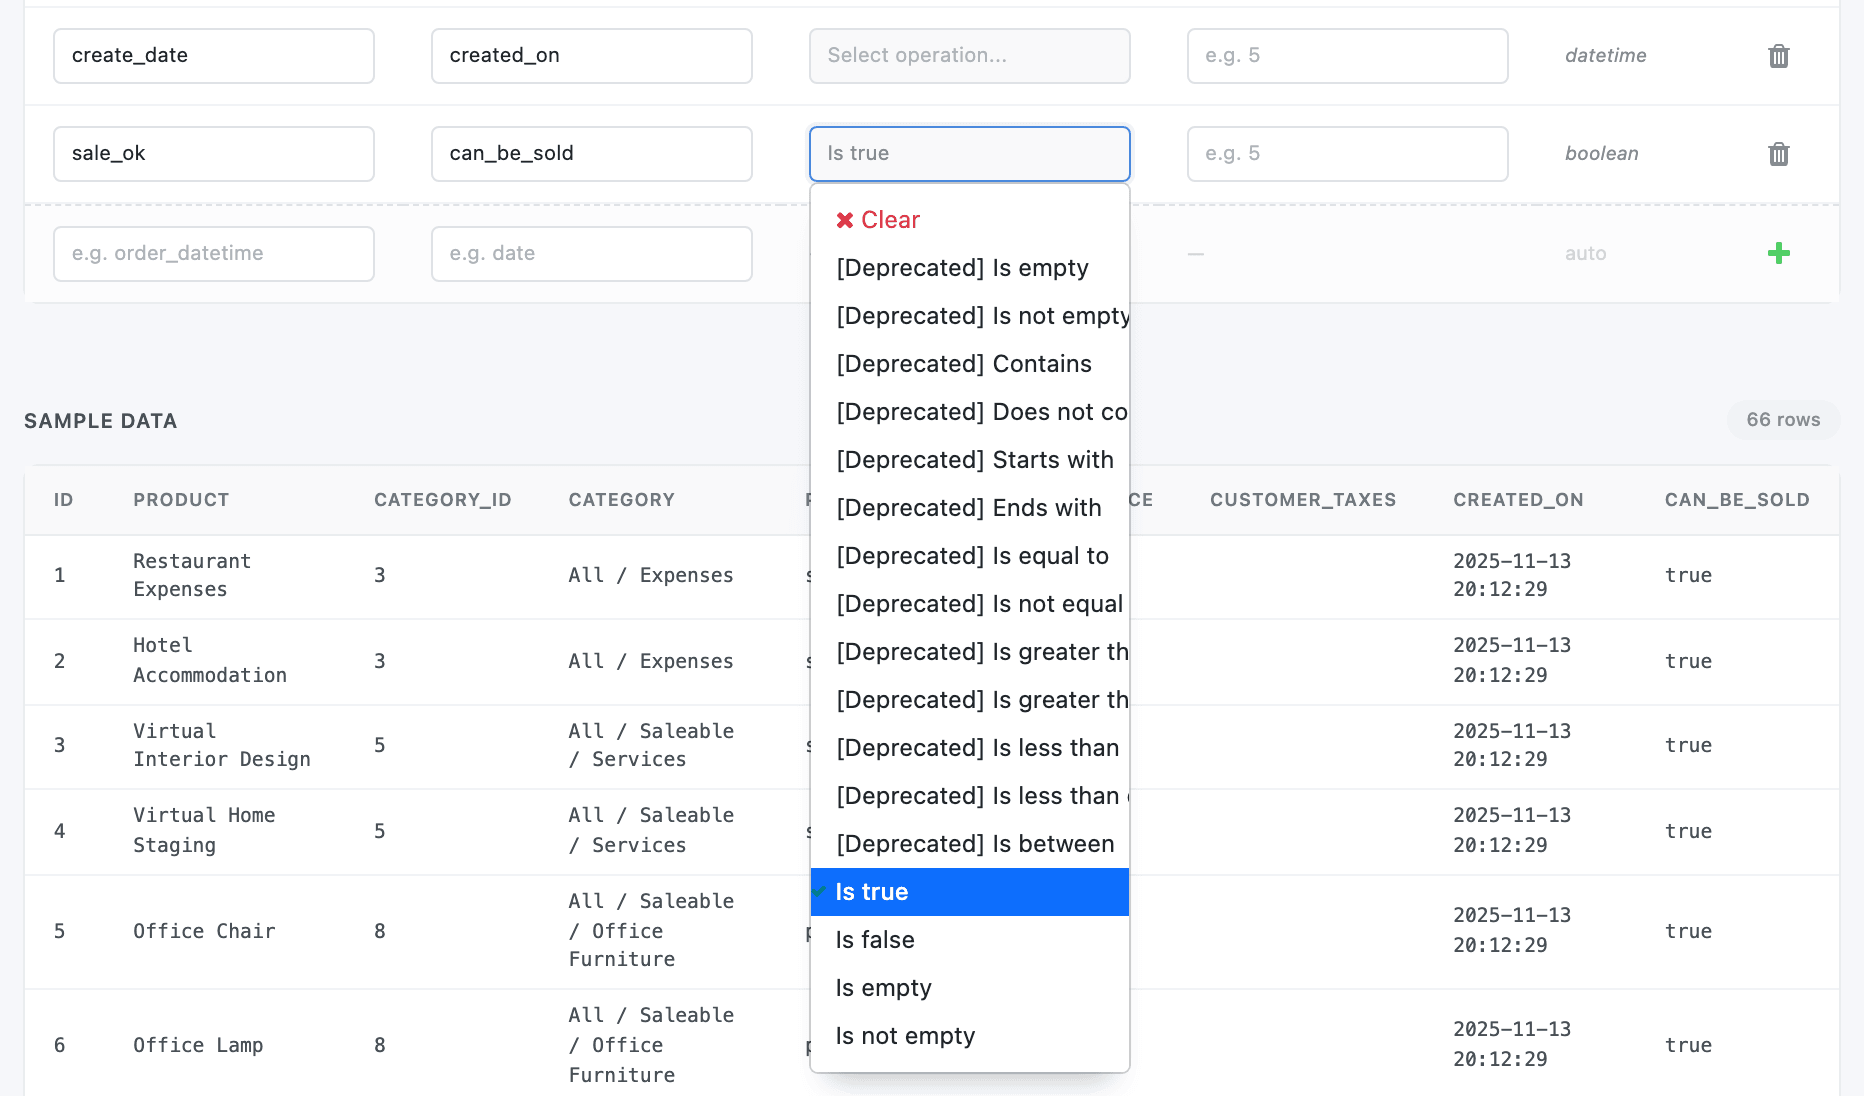
Ignore the operations marked [Deprecated]: they are kept only so filters made with older versions keep working. Clear removes the operation.
Things to know:
- One condition per field. Conditions on different fields are combined with AND. Don’t add the same field twice with a condition on each: the dataset then fails to generate. For “this or that”, use Is in list on one column.
- Is between needs two values, and the Dataset Builder has one value box. Enter the second value in DTS (Configurations → Advanced Configuration → DTS), on the dataset’s Fields Operations tab, in the F3 column.
- Relative dates such as This month or Last 30 days move with the calendar: they are worked out when a widget reads the view. On a stored dataset they are worked out when the copy is refreshed.
- Prefer widget filters for anything a viewer might change. A Where Clause is invisible on the dashboard and applies everywhere the dataset is used.
6. Check the result
Section titled “6. Check the result”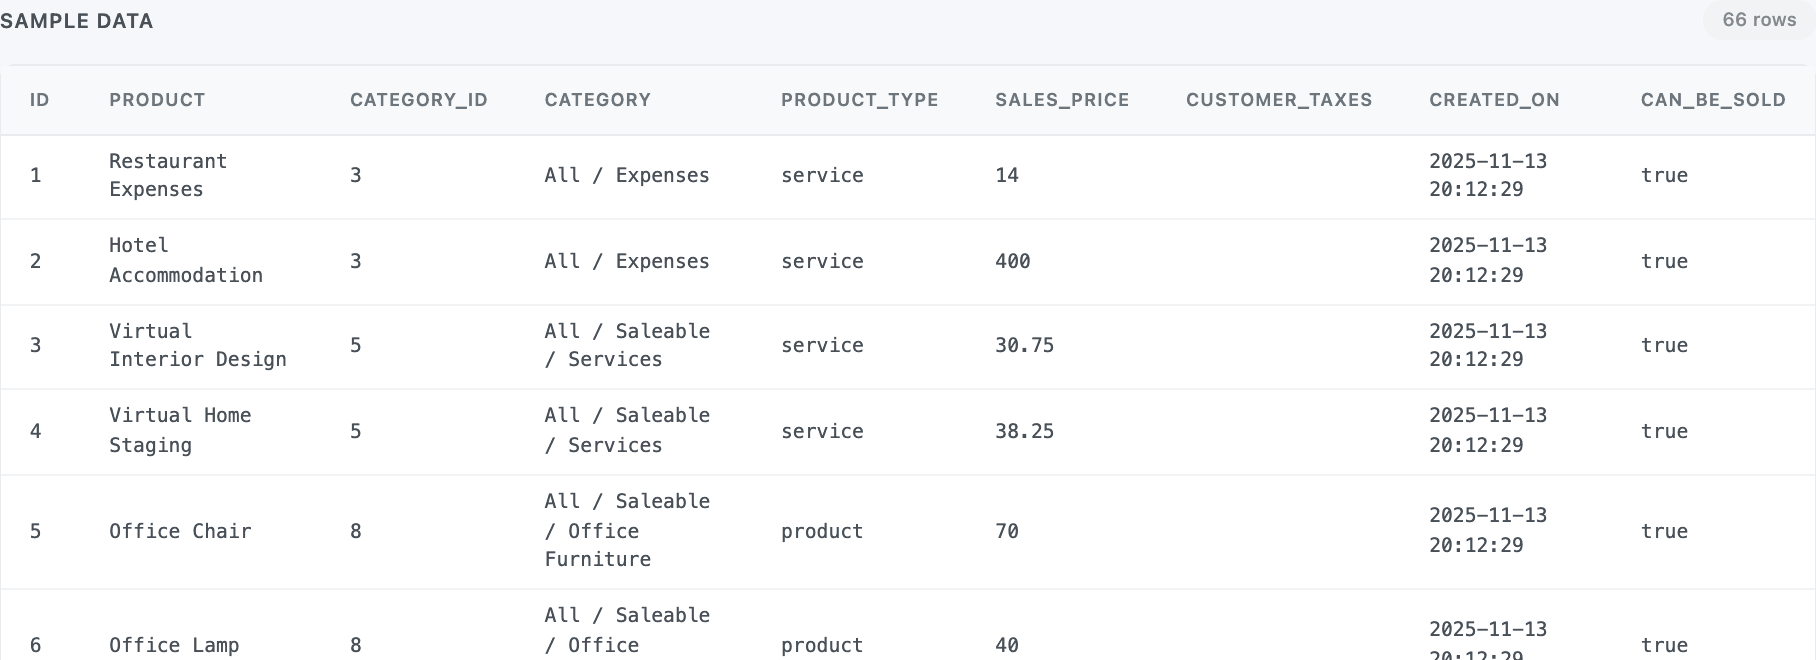
Check Sample Data after each change: the row count, empty columns, and whether names look right. The many2many column above shows nothing for products without taxes, and the datetimes are already shifted to UTC+3.
Rename, export and delete
Section titled “Rename, export and delete”- Rename: click the pencil next to the name, type, then click the check (Save) or the cross (Discard). Widgets keep working. The view takes the new name the next time the dataset is regenerated, so update any hand-written SQL that reads the old view name.
- Export CSV: the download icon saves every row of the dataset as
<dataset name>.csv. It runs the dataset’s query live, even for a stored dataset. - Delete Dataset: the trash icon asks for confirmation and can’t be undone. A dataset that any widget uses, directly or as part of a join or union, can’t be deleted: Odoo refuses with The operation cannot be completed: another model requires the record being deleted. Point those widgets elsewhere first. Deleting a dataset also deletes the target plans built on it.
Where to go next
Section titled “Where to go next”- Combine this dataset with others in a widget: Joins and unions.
- Add calculated columns to a widget: Custom fields.